Maintaining the roof of your recreational vehicle (RV) is crucial for prolonging its lifespan and ensuring your comfort and safety while traveling or living in it. Common issues like leaks and wear can turn into costly problems if not addressed promptly. This guide offers comprehensive insights into RV roof repair, helping you to identify problems, decide between DIY and professional repair options, and understand the maintenance required to keep your roof in top condition.
Understanding RV Roof Types
Materials Used in RV Roofs
RV roofs are primarily made from three materials: rubber, fiberglass, or aluminum. Rubber roofs, either made from Ethylene Propylene Diene Monomer (EPDM) or Thermal Poly Olefin (TPO), are lightweight and flexible. Fiberglass offers a hard and durable surface, while aluminum roofs are sturdy but can be prone to denting.
Benefits and Drawbacks of Each Type
Rubber roofs are cost-effective and easy to repair but require regular maintenance to prevent degradation. Fiberglass is less prone to puncturing but can be more challenging to repair and maintain. Aluminum, though durable, can suffer from corrosion if not properly treated and maintained.
Identifying Your RV Roof Type
Knowing your RV’s roof type is the first step in effective maintenance. You can usually find this information in your RV’s manual. Visually inspecting the roof can also help, as rubber roofs feel soft and pliable, fiberglass is rigid and smooth, and aluminum is metallic and solid.
Signs Your RV Roof Needs Repair
Visible Damage and Wear
Regular inspections can reveal issues such as tears, holes, or cracks in the roof material. Look for signs of stress, especially around fixtures like vents and air conditioning units, where leaks commonly start.
Leaks and Water Damage
Water stains on the interior ceilings or walls of your RV are telltale signs that your roof may have leaks. Tracking down the source of a leak early can prevent more extensive damage and is a crucial part of RV roof repair.
Age-Related Deterioration
As RV roofs age, they can show signs of wear like thinning material or fading color, which can indicate a need for repair or replacement. Regular checks will help you notice these age-related changes.
DIY RV Roof Repair
Tools and Materials Needed
Essential tools for RV roof repair include a sealant compatible with your roof type, a putty knife, a caulking gun, and possibly replacement panels or patches. Ensure you have a sturdy ladder and safety gear since working on roofs can be hazardous.
Step-by-Step Repair Process
Start by cleaning the area around the damage thoroughly. Apply the sealant or adhesive to the damaged area, then place the patch or replacement material. Smooth it out to ensure it adheres well without any bubbles or gaps.
Safety Tips for DIY Repair
Always prioritize safety by using a stable ladder and working with a partner if possible. Avoid walking on wet surfaces, and consider wearing non-slip shoes and protective gear.
Professional RV Roof Repair
When to Call a Professional
If the damage is extensive or if you’re unsure about the extent of the repair needed, it’s wise to consult a professional. Significant structural damage, large leaks, or electrical issues from water damage are all cases where professional expertise is necessary.
Choosing the Right Repair Service
Look for repair services with good reviews and ample experience with RVs. It’s essential to choose a service that specializes in RVs, as they will have the specific knowledge and tools needed for effective repairs.
What to Expect from Professional Services
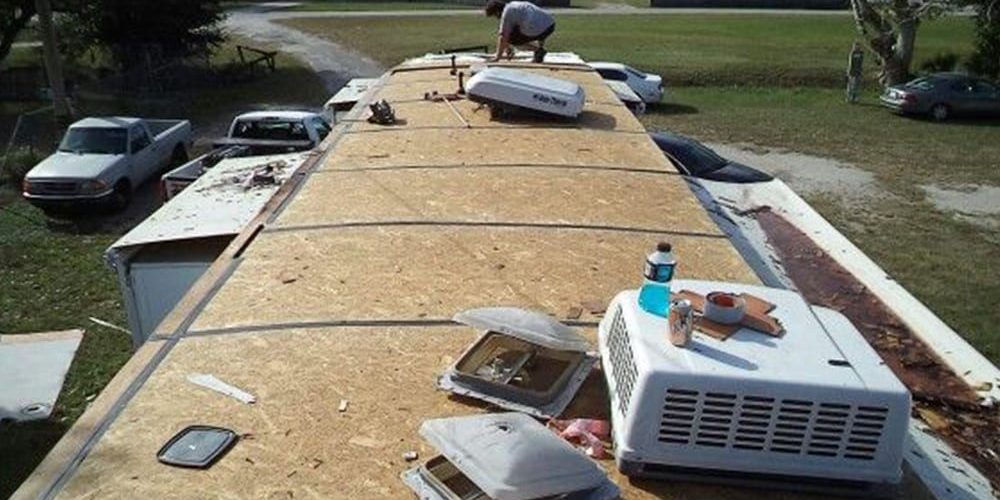
Professional repair services can offer a comprehensive assessment and will handle repairs from start to finish. This may include replacing large sections of roofing, ensuring proper sealing and fit, and a warranty for their work.
Preventative Maintenance for RV Roofs
Regular Inspection and Cleaning
Regularly inspect your RV roof for any signs of damage or wear, and keep it clean from debris and dirt. This not only extends the life of your roof but also makes regular inspections easier and more effective.
Protective Coatings and Sealants
Applying protective coatings and sealants can significantly extend your roof’s life by preventing UV damage and reducing wear from exposure to the elements. Make sure to use products that are compatible with your roof’s material.
Addressing Small Issues Promptly
Small problems like minor leaks or slight damages can become major issues if ignored. Address these promptly to avoid more significant repairs down the road. Regular maintenance is key to minimizing the need for more severe RV roof repair.
Common RV Roof Repair Mistakes
Ignoring Small Leaks
Never overlook small leaks. Water damage can spread and lead to mold, wood rot, and structural damage that could compromise the entire RV.
Using Incorrect Materials
Using materials not suited for your type of roof can cause further damage or fail to fix the problem. Always check compatibility before applying any new material to your RV roof.
Poor Application Techniques
Improper application of sealants or repair materials can lead to incomplete repairs that might not fully protect against water. Ensure you follow the application instructions carefully or consult a professional.
Seasonal Care for RV Roofs
Preparing for Winter
Before winter, ensure your roof is free of debris and water. Applying a fresh coat of sealant can help prevent damage from freezing and thawing cycles.
Summer Maintenance
High temperatures and UV light can degrade roof materials. Applying a UV-resistant coating can help protect the roof from sun damage, reducing the need for frequent repairs.
Tips for Humid or Rainy Climates
In areas with high humidity or frequent rain, check for and repair any leaks before the rainy season begins. Regularly cleaning the roof to prevent algae or mold growth is also critical.
Technological Advancements in RV Roof Repair
Innovative Materials and Tools
The market now offers more advanced materials that are more durable, easier to apply, and better at preventing leaks. Tools like moisture meters and thermal cameras can help identify hidden problems.
Smart Maintenance Solutions
Technology such as mobile apps can remind you of scheduled maintenance and provide tips on conducting inspections and minor repairs.
Future Trends in RV Roofing
Expect more innovations in materials and methods, with trends moving towards eco-friendly solutions and longer-lasting products.
Cost Considerations for RV Roof Repair
Estimating Repair Costs
Costs can vary based on the extent of damage and the type of roof. Minor repairs may cost a few hundred dollars, while more extensive damages could run into the thousands.
Cost-Effective Repair Strategies
Performing regular maintenance and addressing issues promptly can be far more cost-effective than dealing with extensive damage. Using quality materials can also save money in the long run by extending the time between repairs.
When to Consider Roof Replacement
If your RV roof requires frequent repairs or if the roof is nearing the end of its expected lifespan, replacing it might be more economical than continuing to pay for repairs.
Insurance and RV Roof Repairs
Understanding Your Policy
It’s important to understand what your insurance covers regarding RV roof damage. Some policies cover damage from natural events but not wear and tear.
Claim Process for Roof Damage
Filing a claim usually involves documenting the damage, providing repair estimates, and sometimes a claims adjuster inspection. Ensure you keep all receipts and documentation related to RV roof repairs.
Maximizing Insurance Benefits
To maximize benefits, ensure that all repairs are documented and use licensed repair services that your insurance recognizes and approves.
Case Studies: Successful RV Roof Repairs
DIY Success Stories
Sharing real-life examples of successful DIY RV roof repairs can provide confidence and insight for others considering similar projects.
Professional Repair Transformations
Case studies of professional repairs can demonstrate the value of expert interventions, especially for complex or extensive damage.
Lessons Learned from Repair Challenges
Discussing what lessons were learned from difficult or failed repair attempts can help others avoid similar pitfalls.
FAQs for RV Roof Repair
1. How often should I inspect my RV roof?
Inspect your RV roof at least twice a year, preferably in the spring and fall, to ensure it’s in good condition and to identify any potential issues before they become major problems.
2. What are the most common materials used for RV roofs?
The most common materials used for RV roofs include rubber (EPDM or TPO), fiberglass, and aluminum. Each material has its own set of maintenance requirements and repair methods.
3. How can I identify a leak in my RV roof?
Signs of a leak may include water stains inside your RV, a musty smell, or visible damage on the roof itself. It’s important to trace the leak back to its source, which may not always be directly above where the damage appears due to water traveling along interior surfaces.
4. What is the best sealant to use for an RV roof repair?
The best sealant for your RV roof depends on the material of the roof. For rubber roofs, a self-leveling lap sealant is often recommended, while fiberglass and aluminum roofs might require different types of urethane or silicone-based sealants.
5. Can I perform RV roof repairs myself?
Many minor repairs, such as sealing leaks or small punctures, can be done by the RV owner with the right tools and materials. More complex or extensive damage might require professional repair to ensure it is done safely and effectively.
6. How do I prepare my RV roof for repair?
Clean the area thoroughly, removing any debris, dirt, or old sealant before applying new materials. This ensures the new sealant adheres properly and provides effective protection against water.
7. How much does it cost to repair an RV roof?
Costs can vary widely depending on the extent of the damage and the type of repair needed. Minor repairs might cost a few hundred dollars, while more extensive repairs or complete roof replacements can cost several thousand dollars.
8. When should I consider replacing my RV roof instead of repairing it?
Consider replacing your RV roof if it has extensive damage, frequent leaks despite regular repairs, or if it is at the end of its expected lifespan. A new roof can be a significant investment but may be more cost-effective in the long run.
9. What should I do if my RV roof is constantly leaking?
Constant leaks might indicate a more systemic issue, such as poor installation or a failure in the roofing material. In such cases, a thorough inspection by a professional might be necessary to determine if a repair will suffice or if a complete replacement is needed.
10. Are there any special considerations for maintaining an RV roof in harsh weather conditions?
In harsh weather conditions, more frequent inspections and maintenance may be necessary. Applying a UV-resistant coating can protect against sun damage, while ensuring proper sealing can guard against snow and rain infiltration.
Conclusion
Regular maintenance and timely repairs are crucial to keeping your RV roof in optimal condition. Whether you choose DIY repairs or professional services, understanding the basics of RV roof care can protect your investment and ensure many years of safe and comfortable travels. Remember, a little maintenance goes a long way in avoiding the need for more significant RV roof repair.


